Showing posts with label Better House Keeper. Show all posts

Thursday, 16 December 2021

Foundation Repair: Key To Better Home Value | Better HouseKeeper

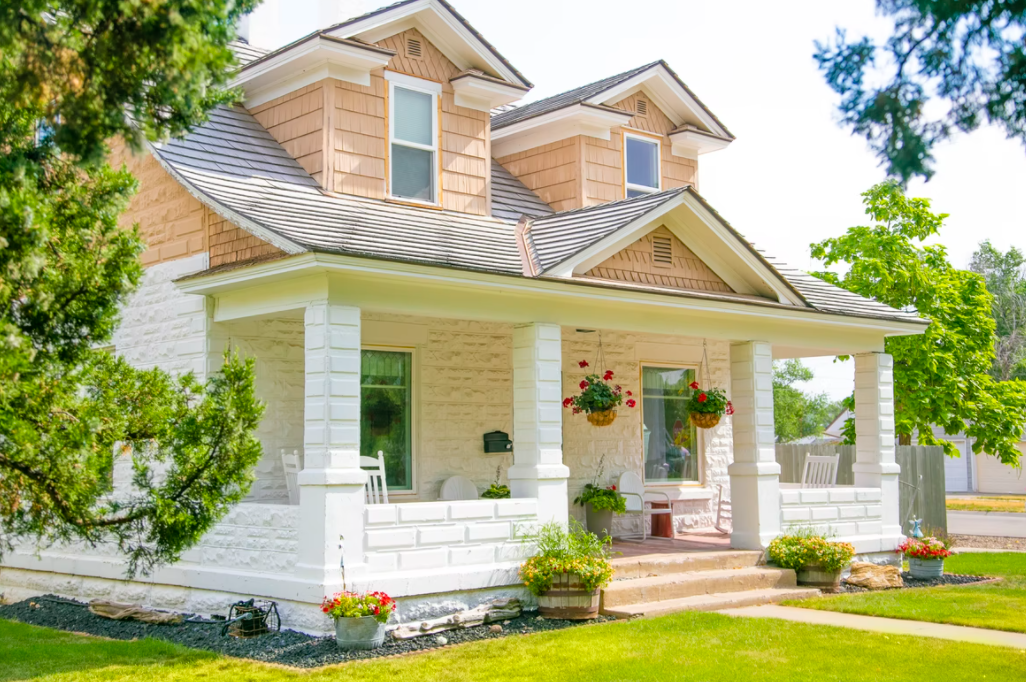
Your home’s foundation is one of the most important things in your home. Here’s why!

Photos By: Adobe Stock Images

The real estate market consists of different clients with different tastes. Some tend to focus on how many bedrooms there are in a house to accommodate a big family, or have it rented by college students. Others some pay more attention to how big the yard is for recreational or gardening purposes. Whatever your preferences are, you should know that the home’s foundation should be one of the first things you should really check before everything else.

What Makes The Foundation Important

Be it rain or shine, the roof and walls of the house shelter you from any the harsh elements. These parts of the home allow you to live a comfortable life through all but the most extreme weather. Meanwhile, the foundation is constantly under the strain of those features, plus the rest of the house.  

Because everything’s built on top of it, you can say the foundation is the heart of any residence. With this principle in mind, if the foundation is undamaged and stable, its integrity will allow it to support the distributed weight of the house. When looking for a new place to move to, you should limit your options to houses with a solid foundation.

Why Foundation Repair Raises Home Value

Let’s imagine being in the buyer’s shoes for a while. You see an expansive, well-kept property that’s perfect for many activities. Inside, the rooms are mint-clean. The walls are free from cracks, and the floors look good as new. You can already see yourself living in this house.  

However, once you go down the lower level, you see water seeping through cracks along the basement, with the musty stench of mold thick in the air. These signs of water damage are potential deal-breakers, and you would have likely changed your mind if you come across these problems. 

As the seller, you must make the house as attractive to potential buyers as possible. Unless you got lucky enough to catch the eye of someone who adores renovating their home as a hobby, then you should hire a foundation repair company to come and work on the home’s damaged foundation. 

Aesthetic purposes aside, shouldering the task of repairing the foundation beforehand may lighten the load for your buyers because a damaged foundation is an invitation for common house problems, such as the following:

  • Mold
  • Flooding
  • Poor insulation
  • Pest infestations

By having the foundation repaired before selling the house, not only will you be helping your buyers, but you’re also avoiding any liability for selling a house that can cause various problems due to poor foundation. 

Furthermore, having the foundation repaired also gives you (or the buyer) more opportunities to renovate the house, as a fresh foundation could make it possible to install new features that wouldn’t be possible before repairs. Therefore, if you’re planning to invest in this house to redesign further or improve its layout to increase its value, then prioritizing a stable foundation is the best way to start.

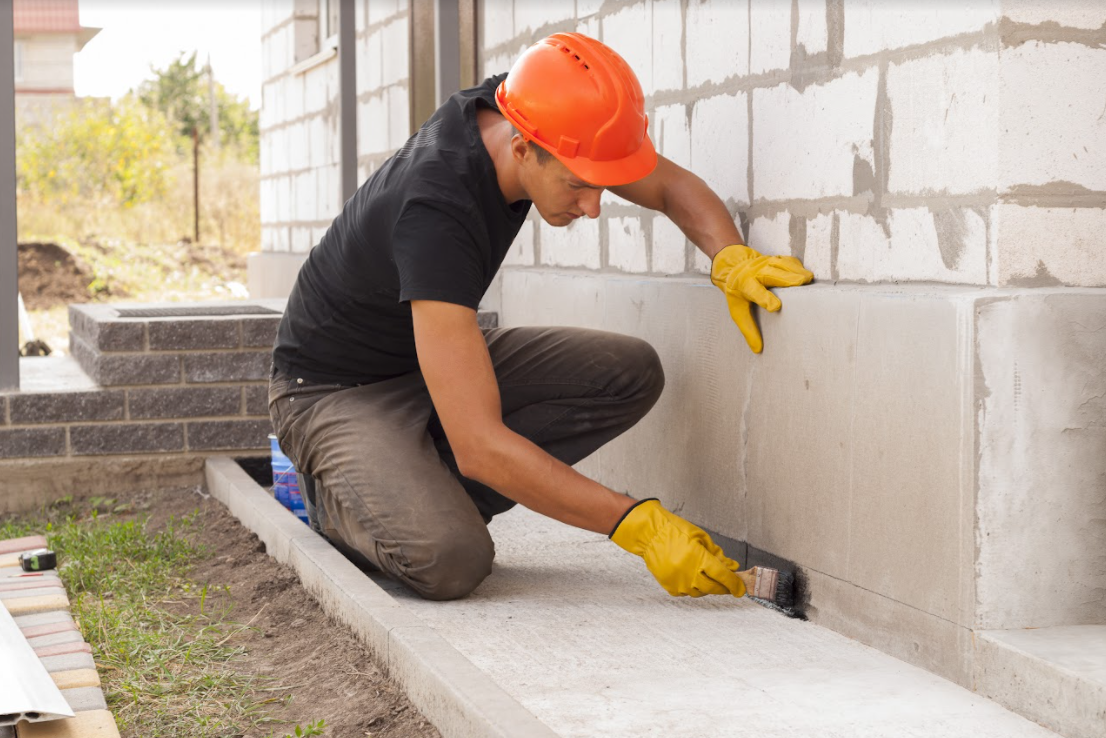
What To Consider When Repairing The Foundation

Hiring a foundation repair company again and again because you can still see hairline cracks along the foundation is a tremendous waste of money. Before you proceed to have the foundation repaired yet another time, why not check on outside factors that can affect the foundation, such as the following:

1. Landscaping 

Although surrounding the house with nature makes it look more attractive, it’s notalways a good thing for the foundation. As trees and other plants grow, their roots tend to go so deeper into the soil, some of these roots might end up digging into the foundation, causing cracks in it.  

Learn all there is to know about the plants you want to grow in your property. Their lifespan, the length of their roots, the distance they need to grow—everything. This way, you can plan how to arrange the plants that are pleasing to the eyes without putting the house at risk. 

If you want to play it safe, why not try potscaping? Instead of wracking your brain on landscaping, you can use potted plants to bring life to your property without having to worry about the soil around your foundation. Furthermore, your buyer will have the freedom to move these plants around in case they want to change things up after acquiring the property.

2. Drainage System

Because your home’s foundation is surrounded by soil, it may not be easy to know what will happen or how the ground will shift, especially with groundwater involved. Soil is somewhat similar to wood: it expands a little if it absorbs water. While this won’t be a problem for your plants, this can be a serious threat to your home’s foundation.  

House foundations are often surrounded by clay soil. This type of soil does the job of holding the water to keep it away from the foundation. However, if you leave the ground dry—especially during the peak of summer it could be prone to swelling when it absorbs rainwater. If a rainstorm comes rolling in, the water will oversaturate the soil, forcing it to expand so suddenly that it pressurizes the foundation to the point that it can cause cracks. To keep this from happening, regularly hydrate the soil immediately around the house.

3. Land Preparation

The soil’s moisture absorption could also be affected by how sloped the terrain is. If the land slopes into your house, rain water runoff is naturally channeled towards your building. Causing soil saturation. This could cause the foundation to shift and become uneven, which itself could compromise its structural integrity. 

Resolving this problem may require significant foundation repairs because workers need to go under the house to check the soil out. In most cases, uneven soil is stabilized and reinforced by saturating the soil with concrete aggregate.

Building Up

The foundation is an often-overlooked part of the house, ignored in favor of having a better-looking home. However, that doesn’t make it any less important, and it deserves more attention especially for those looking to sell a house. For the seller, keeping the foundation in top shape will increase the value of the residence. For buyers who are still new to the real estate scene, learning how a solid foundation can affect the entire house is a must if they’re looking for the home of their dreams. 

A Beginner’s Guide To Protecting Your Property- Inside And Outside | Better HouseKeeper

Protect your property and investment, here is how to start!

Photos By: Stock Images

Just the way you are protecting your finances with the help of banks and other financial institutes. Then why don’t you bother to protect your property also? You should. When it comes to protecting your property, there are a lot of things you should consider. It also ensures the security and safety of your loved ones. The last thing you will want is to lose your favorite vase that you got from France or your antique jewelry collection.

Tips To Protect Your Property

Here, we will guide you with some ways and the things you should implement as soon as possible in order to protect and ensure the security of your property. In case you do not have that much time to work on your home security system, you can try the complete Smith Thompson ideas for securing your home.

Secure The Doors

The very first thing you should consider is securing the entrance points of your home. Whether it is the main gate or each and every door of your house, no matter how many doors you have in your house, you have to secure them all. In order to do that, you can do anything from installing those traditional lock systems or anything else. But it is always advised to go with the smart automation lock system, which will offer more improved security results.

Light Up The Landscape

Setting up proper and adequate lighting on the lawn and another landscape is essential when you are investing your money in order to secure your home. These are the places, which offer shelters to those thieves and burglars. Though you have installed security systems and cameras, it will not ensure the utmost safety until and unless you are lighting up the landscape areas. Make sure the light is enough to see in the dark.

Set Up Security System

Now comes the most crucial one. In today’s world, thieves and burglars have become smart; they know how to avoid security cameras and break smart locks. But we can be smarter and protect our property by installing a smart security system. This type of security system is smarter than those thieves. You can check out the features to understand how they work. But a security system has become a must these days. When you set up a security system, the criminals will leave you in peace due to the fear of getting caught.

Lock The Windows

You have locked the doors; you have lighted up the landscape; everything is great. But what about the windows? You can not forget about the windows, as they can be the entry and quick escape for those burglars. So, when you are installing locks to your doors, you should get locks for the windows as well. For windows, you also can utilize automated locking systems or smart locking systems. It will always be safer and more secure when you will take help from more enhanced technologies.

Don’t Skip The Garage

Garage! This is the place that can be the perfect hideout for those burglars. How can you forget to secure their place? In most cases, the garage has a direct entrance to the house. We hope, now you can understand, why it is crucial to secure the garage also. Along with locking the garage entrance, you also have to pay attention to the passage that is connected to the garage and your main house. In short, you can’t skip a single entry point that you yourself use to enter the house.

Install Security Camera

We don’t think about the importance of installing security cameras at your home when you are thinking about or planning to get more enhanced security for your home. There are a bunch of security cameras available in the market. Some also can be connected to your mobile or laptop via a particular app or software. Along with installing the camera to get the outer view of your house, do not forget to check the interior as well. While buying cameras, check the features, along with night vision, storage, coverage area, and resolution, obviously.

Eliminate Hiding Places

We know the last thing you will want is to offer hiding places to those criminals who are coming to rob your valuables. Bushy trees, any shaded place with low or simply lowlights are the perfect spots for burglars to hide and wait for the perfect time to enter the house. In order to secure those places, you can set up proper lights, install high-quality security cameras. Or, in best cases, you can ignore building such places. Do not plant big trees with bushes, rather garden small plants.

Use Home Automation

Using home automation is the best solution at present for several purposes. Whether it is to reduce your daily work, or increase your efficiency, or enhance your leisure time, home automation is serving great. The best thing is that they are also a great choice for security-related solutions as well. Automatic lights are great if the sensor detects any motions during the night. Automatic alarm and notification sender are some other options. There are also some security systems, which detect the threat and notify the nearest police station or fire station as well.

Lock Down Your Wi-Fi Network

Your automation system or smart home security system solutions are also vulnerable to cyber threats, as they all are connected to the Wi-Fi network you are using. Now, suppose your wifi is not secured with a password. This way, anyone will be able to connect with your Wi-Fi and will be able to access your security systems. The burglars can disable all security systems before entering your house. So, you have to ensure that the Wi-Fi network you are using is also secured.

Build A Secure Home 

These are the things you should try when you are finding ways to secure your home. Now, your job is to get the best of class equipment to get installed and make your home a better place for your loved one. Protecting your property is not an easy task, so if you think it is too much work, feel free to reach any distance.

How to make IKEA Furniture Assembly Quicker | Better HouseKeeper

Tired of assembling IKEA furniture? Here is how to assemble their furniture fast!

Photos By: Pexels

IKEA furniture has been known to end marriages and friendships across the globe. There is nothing quite as frustrating as assembling an IKEA flatpack. One person may have read the instructions wrong, or you might realise a key component is missing. IKEA flatpacks generate an enormous amount of stress, anger and utter fury. However, IKEA furniture is also affordable, stylish and accessible. You can buy it in-store, assemble it at home, and you’re done. Simple. Besides, there is no greater joy than finally assembling a flatpack piece of furniture. Follow this quick guide to assemble IKEA furniture like a boss.

Skim Through the Instructions First

Before you start building anything, get the instructions out. Make sure you have all the pieces laid out, and look out for anything that is missing. You can identify a missing component before it’s too late. You can contact the IKEA customer service team with your name, address and phone number. Once they have received your query, they should send you the missing part free of charge. Skim through the instructions from start to finish. You need to know how the furniture will come together as a whole. Look out for keywords as you skim through and pay attention to the images.

Gather your Tools

Find the tools included in the IKEA flat pack to assemble the furniture. Usually, IKEA furniture can be assembled with a small Allen key. If you plan to DIY the piece, you may need more specialist gear. Consider investing in your own power tools to make building a little easier or adding a few personal touches. You could even combine two pieces of furniture to make your very own design. You need a tool chest to keep all of your new tools safe and secure.

Use Glue

IKEA furniture often makes use of dowels, and you can use a hammer to secure them. IKEA furniture is known for its affordability – not its durability. Use strong wood glue to secure the joinery between pieces and help the furniture last for longer.

Don’t Damage It

We have all done it. You are desperately trying to fit two components together, and the flatpack instructions are not helping. Eventually, you chip and scratch the components to make them fit together – and assemble a piece of furniture that sort of resembles the image on the box. If you are reaching boiling point, step away from the flatpack and give it another go later. There is no point in damaging your furniture because you are angry and irritated. Do not let the flatpack win. Fill your home with IKEA furniture and create a stylish space on a budget.

Tuesday, 14 December 2021

Secret Cooking Tips And Tricks That Will Save You Time In The Kitchen | Better HouseKeeper

We all know that saving time in the kitchen is of the utmost importance!

Photos By: Stock Images

If you spend more time preparing your food, then it will take longer for it to get on your plate! So what are some tips and tricks to saving time while cooking? Here are a few.

Upgrade Your Cooktop 

Huge help with preparing a lot of meals could be a better cooktop that could let you prepare your meals a lot faster. People are using the option of Cuisinart ICT-60 because they heat up much faster and have multiple heat options. This is a great way to save time in the kitchen and have food prepared with just a little effort on your part. It’s also going to allow you to create delicious meals that everyone will love when they come over for dinner or if they stop by during the day while you’re at work, so it’s a great investment for your home. 

Take the time to upgrade your cooktop and you’ll be able to save yourself some time in the kitchen so that you can focus on doing other things that are important to you. It’s definitely worth it!

Have All Your Utensils At Ready

If you take out all the utensils you’ll need before you start cooking, it will save you time in the kitchen. Not having to run back and forth between the stove and utensil drawer will make your cooking experience much smoother. It’s also a good idea to have all of your ingredients prepped and ready to go before you start cooking. This will help minimize the amount of time you spend in the kitchen. This method may take a little bit of time to get used to, but once you do, you’ll be able to cook your favorite dishes in no time! Try it out and let us know how it goes.


Prepare The Ingredients Before You Start 

It’s always smart to also prepare all of your ingredients before you start cooking. This way, you won’t have to waste any time running back and forth between the stove and the fridge or pantry. Plus, it’ll help ensure that you don’t forget anything!

Here are the things you can do this with before starting to cook:

  • chop vegetables ahead of time
  • pre-measure out spices or seasonings 
  • season the meat and set to the side
  • mix together with sauces or dressings
  • place breading on chicken or fish 
  • line a baking dish with parchment paper

Clean While Cooking 

Once you’re done cooking, cleaning the stove and surrounding area is the last thing you want to do. However, if you are clean as you cook, it’ll be a breeze. Here are some tips. Use a damp cloth to wipe down the stove while food is cooking. This will prevent any messes from sticking and makes cleaning up afterward much easier. You should also keep your countertops clear of clutter by putting all ingredients and tools away as you use them. This way, there won’t be anything for dirt or grease to cling onto.

You can also clean the dishes while cooking. While you are waiting for the stove to heat up or your food to simmer, clean all of your dishes so they can air dry while you cook. This way, when it’s time to eat, there will be no need to put them in the dishwasher because cleaning was already done beforehand!

Plan Meals Ahead 

If you know what you’re going to make ahead of time, you can avoid making unnecessary trips to the grocery store and spend less time in the kitchen. Planning your meals also allows you to use leftovers in creative ways. Look through cookbooks or online recipes and choose a few dishes that sound appealing. Make a list of the ingredients you’ll need for each dish. After that, check to see what ingredients you already have on hand. Once you’ve planned your meals, it’s important to follow through with them! 

Cook Larger Batches

You should consider cooking larger batches as a way to save time in the kitchen. By cooking more food at once, you can minimize the amount of time that you spend cooking individual meals. Additionally, doing this will allow you to have leftovers that can be eaten later on during the week. 

Choose recipes that can be cooked in large quantities. There are many recipes that can be easily adapted for cooking in large batches. Try looking for recipes that use ingredients that can be easily doubled or tripled. Cooking multiple dishes at once will save time. Instead of cooking each dish individually, cook them all together in one big pot or oven. This will also help to ensure that everything is cooked evenly.

Cooking can take a lot of time from a day so it would be smart to know how to save time. A better cooktop is always in order and you can prepare the utensils as well as the ingredients ahead. Clean the dishes and everything around while cooking and plan your meals ahead. Another great tactic would be cooking in larger batches so that you’d have food for multiple days ahead. Have fun with your newly-gained free time!

Winter Weather Damage Alert | Better HouseKeeper

Here are some ways the winter weather can damage your home, and how you can prepare for it!

Photos By: Unsplash

The winter season is usually received with much warmth, especially since it is also the same time people celebrate the happiest holidays of all. But it can be unkind to your homes. Every winter is different. Some years you experience a relatively mild winter, and the others, you get really chilly together with snow, rain, wind, and ice. Nonetheless, you have to prepare your home just the same. Even the mildest winter could wreak havoc if you welcome the season unprepared. Here are several ways the winter weather could potentially damage your abode and what you can do to prevent or treat them.

Fierce Winds can Damage the Roof and Other Parts of the House

With strong winds come fallen leaves that collect in the roof and gutters. The incident may lead to clogging and sometimes water damage since the water that cannot get through clogged downspouts may leak into the home, cracking foundations and flooding basements.

Strong winds may also cause broken branches to hit different parts of the house and break glass windows, doors, and others. As a result, it may reduce your home’s protection against the elements and make you vulnerable to costly home repairs overall.

To prepare against fierce winds, make sure that you leave no loose objects in your yard. You must also inspect your shrubs and trees and cut down any dead branches that may easily give in.

The Freezing Cold can Crack the Caulk and Create Drafts

The chilly weather is not only bad for your health but your utility bills as well. As the temperature drops, the caulk starts to crack, creating drafts in the windows and doors, letting the cold air in. When that happens, your heating system gets overworked and requires more energy to run efficiently.

The cool weather also encourages mold and mildew to permeate the house. When you keep all the windows and doors shut to preserve the heat, moisture is trapped, and that’s how mold grows.

A great way to avoid higher energy bills is to keep track of the caulk and reapply as needed to seal off the drafts. To deal with mold growth, you need to invest in a dehumidifier, which will keep the air moving and the humidity levels low.

Heavy Snowfall can Strain the Roof

Ice and snow that collect in the roof could give you severe troubles like loose shingles and ice dams. Too much of these winter staples can bring down your shade completely or, at the very least, cause cracks that may let water in and cause harm to the ceiling, walls, and other areas.

To keep the worst-case scenario from happening, make sure that you clear out your roof and gutters with all forms of debris before the chilly weather sets in. Once it starts snowing, you brave the cold once in a while to de-ice. You need to control the amount that collects on the roof and keep it out of dangerous levels.

We can’t blame you if you constantly have a love-hate relationship with the chilly weather. To better enjoy the season and keep your home free from possible damages, make sure you do the necessary precautions and preparations.

Tuesday, 7 December 2021

Uses Of Citric Acid | Better HouseKeeper

Multiple citrous compounds around our house contain citric acid. It serves a variety of purposes!

Photos By: Unsplash

You can use citric acid for cleaning because it’s considered a natural cleaner. It has a lot of cosmetical benefits as well. It also has a variety of health benefits for you. In addition, the abusive or impractical use of citric acid can result in severe health conditions. On the contrary, if you learn to use it right, you’ll wander around looking for stock for potential needs. Here’s how you can utilise the available citric acid in your home and create something beneficial for yourself. 

Citric Acid As A Skin Product 

In general, citrous fruits and citric acid compounds have a lot of benefits for your skin. You can use it to combine with other skin fitting components like honey, yoghurt, etc. Here is what citric acid does for your skin. 

  • It helps exfoliate your skin. Citric acid removes dead cells from your skin and enlightens your pores. It helps unclog skin pores from the debris of dead skin cells, dust, and other harmful components that stimulate pimples. That is one of the reasons why citric acid is effective against inflammation of pores and acne on the skin. If you want to prevent potential rashes from turning into acne, experts suggest that you use products with citric acid in them. 
  • Every skin tone is equally beautiful. But some specific unhealthy situations deteriorate the skin condition and leave it dull and full of dandruff. Citric acid helps remove dandruff from your skin, limiting the frequent moisturising requirements on your facial skin. It also enlightens your skin tone to its natural colour, exfoliating all the debris away. 
  • Critic compounds help tighten your skin and reduce wrinkles. Wrinkles don’t necessarily pop up due to old age; other factors trigger wrinkles, like consistent facial expressions and bad posture. People use compounds with citric acid to limit the probability of emerging wrinkles on their faces. 
  • It is also an essential compound of many skin products because it helps regulate its pH. You need to balance your skin pH because it helps fight off bacteria and other infectious components from invading the skin layers. It helps consistently keep the upper layer of our skin acidic to kill harmful microorganisms. 

As A Culinary Tradition 

Citric acid serves a variety of purposes in the culinary world. It is the main ingredient of garnishes numerous recipes that make their textures pop. A specific range of vegetable species produces this food additive that enhances the tastes of any palate. People most commonly add it to food in the form of white powder. Its addition to edibles is because it has a lot of health benefits in store. For instance, citric compounds reduce the risk of kidney failure, treat many complicated infections and prevent them from reoccurring. 

You can use it to make jams and jellies that are stable in their form. A lot of juices also contain citric acid. If you prefer canned foods, you can find them in the list of ingredients because it helps preserve food for a longer term. Companies add it to their snacks to give them a nudge of acidity and sour taste. 

As A Cleaning Agent 

One of the most common uses of citrous compounds is for cleaning. You can use it to clean off almost anything. That is the main reason why it’s considered an all-purpose cleaner. Here is how citric acid serves as a cleaning agent. 

  • You can use it to clean your toiletries. It is also very easy to DIY at home. People often create these cleaners themselves rather than spending money on them in supermarkets. You can, too, try to make a citric solution and use it for cleaning out toiletries. It removes stains from your toiletries and makes them appear brand new. 
  • You can use it to scrape off soap scrum from furnishings. Making your furniture appear brand new is a classic trick you can imply by creating your citrous solution. It also removes hard water stains from the table. 
  • Critic acid is a compound of laundry detergents. Detergent and soap making companies widely support citric acid usage because it’s an excessive cleaning agent and reduces the amount of cleaning residue. It’s present in powdered form because that’s its most effective shape. 
  • Citrous compounds are very effective against rusty surfaces. Rust is one of the most significant issues around our homes because it spoils the steel equipment and furniture. You can use a citric solution to get rid of rust in no time. 
  • Dishwashing detergents also contain citrus compounds because they remove stains and make the white crockery appear brand new after the wash. Observing any dishwashing agent will include a citrous combination that you can use for various other cleaning purposes around your home. 

Reasons Why to Install 5 Smart Home Gadgets | Better HouseKeeper

Make your life a little easier by installing smart home gadgets. Here’s why!

Photos By: Unsplash

It’s something we’ve all done. We’ve gone out and purchased useless things that we don’t need just because they seemed cool at the time. Then we’re stuck with a pile of trash, which we either throw or try to sell. On the other side, there is some truly amazing technological advancement that is useful. Many of today’s basic home gadgets will handle some of your work for you, such as regulating the thermostat, locking the front door, and moen 1224 catridge replacement. And, if utilized correctly, these tools should make your life much easier. Let’s explore some of the most interesting and widely used gadgets: 

1. Innovative Cooking Equipment

Wouldn’t it be wonderful if you arrived home from work to find a pot of coffee ready for you? What about a “smart pan” that alerts you when it’s time to flip your omelet? You’ll find everything from meat thermometers to kitchen scales on this list of “smart” kitchen devices. 

2. Smart Door Locks

You may use your smartphone, a unique key fob, or biometrics to lock and open your doors with a smart lock. These locks are keyless, making it far more difficult for burglars to get access to your property. If you aren’t home to greet visitors, you can use a specific app to let them in.

3.  Lighting Controls

Your remote device can be used to control the lighting in your home. If you’re out and about and want to make sure the lights are turned on, this is a nice feature to have. It is meant to be energy efficient, so you will save money on your monthly energy bills over time.

4. Thermostat 

This is a thermostat that you can take with you wherever you go. It can detect seasonal variations, changes in temperature, and so on, and will automatically adjust. You’ll never need to struggle with a thermostat dial or keypad again because this one takes care of everything. 

5. Security Cameras with Wi-Fi

These are the most up-to-date home security systems, and they connect to your house’s Wi-Fi. Motion sensors, two-way audio, and several recording choices are available.

Reasons of Installing 

Every day, technology develops, and having a smart home is becoming a need. Smart homes were once seen to be a luxury item, but they have now become an integral part of our daily lives.

1. You are in your Comfort Zone

Smart homes make life easier by avoiding the need to walk from room to room to accomplish different chores. You may use smart gadgets to do all household tasks with apps while relaxing on the sofa or in bed.

2. Peace of Mind

A smart house can also provide peace of mind by allowing you to monitor the doors, windows, and water spill sensors, among other things. You can also use an app to ensure that your garage door is safely closed. It is not necessary for you to walk outside to check. People who use smart home technologies in their houses can save anywhere from 10% to 30% on their energy bills. Every time we leave the house, we forget to turn off the lights.

3. Convenient

Having a smart home allows you to control a variety of electronic devices and systems from anywhere in the house or around the world. Close the shades, put on the lights, and keep an eye on security. The smart home’s listed features are sufficient to persuade a person to make their homes smart as well.

4. Home Alarms that Can Save Your Life

Fire and theft are just two examples of catastrophes that might destroy your home or risk the lives of your friends and family. Smart home devices can notify you of such incidents via alarms and notifications, which could save your life.

Final Thought 

What’s new with you these days? Because of the numerous benefits of smart home technology, we may expect to see more of it in the future, with voice command systems or applications playing a larger role in our daily lives. As a result, smart home technology will be useful in the future to meet the needs of the next generation. 

How to Clean Your Coffee Machine for a Delicious Brew | Better HouseKeeper

Knowing how to maintain your coffee gear should be on your top list if you run a coffee shop or are a coffee lover!

Photos By: Unsplash

Coffee build-up and mineral deposits from water can dramatically affect the way your coffee tastes. Moreover, it can damage your machine and reduce the efficiency of drip operation. If you fail to clean your maker regularly, it can produce a bitter coffee taste. Your maker will work more slowly because of the minerals from hard water, which will narrow the water channels. The quality of coffee taste depends upon how long your coffee grains last and how clean is the coffee gear. Here are some reasons why cleaning and maintaining your coffee machine should be a priority.

Reason Why You Should Clean Your Coffee Maker

To Stop Mold Growth

The dirt and grime accumulation acts as a perfect host for mold growth. Moreover, if the machine is kept in a dark and moist place, it further provides a suitable environment for its development. If you leave your device uncleaned for many days, it increases the chances you will end with mold in your coffee.

Avoid Contamination with Bacteria

As you keep brewing coffee throughout the day, a film forms around it, highly attractive to bacteria. It can therefore give rise to bacteria colonies once these microorganisms are trapped. Like this, some bacteria get washed into your coffee every time you brew coffee.

Help Run it More Quickly

Keeping your coffee maker clean will ensure proper functioning without grime blocking the water flow. If grim accumulates in the maker, it tends to slow down the process and takes a long time to make a single cup of coffee.

Better taste Quality

Dirt build-up can also affect the taste of your quality. In addition to choosing the top coffee brand, it is essential to regularly clean and decalcify your coffee maker. Cleaning your machine with a Keurig descaling solution can significantly change the coffee taste, giving it a cleaner mouthfeel.

To last Your Machine Longer

If you allow the grime and calcium deposits to build up, it can interfere with your machine and adversely affect its lifespan. Cleaning the coffee maker regularly will prevent difficult stains and make cleaning easier. You can save your money by prolonging the life of your machine.

Impression on Your Guests

Whether you run a coffee shop or use the maker at your home, you may end up disgusting your guests if you brew coffee on a dirty maker. Make sure it’s clean to enhance your and the guest’s experience.

How Often You Should Clean a Coffee Maker

It is best to clean your maker to increase the lifespan of your appliances is after every use or regularly at the end of the day. Deeper cleaning to remove mineral deposits should be done every three months. If your tap runs with hard water, the residue can build up more quickly, so cleaning every month is the best option.

Some coffee brewers have an audible or visible signal to indicate a forced downtime. It would be best to maintain it clean to avoid any downtime. Make sure to follow the manual of your coffee maker that has detailed cleaning instructions.

Basic Method to Clean a Coffee Maker

Cleaning methods can vary depending upon a coffee maker model and the type of machine used. Let’s talk about how to clean a maker with soap and water. Here are the steps that can follow to ensure proper cleaning technique.

  1. After every use or end of the day, remove the brew basket and filter. Remove all the residue and discard any disposable paper filter.
  2. Fill your sink partially or a suitable container with warm water.
  3. Add a dishwashing soap in the water especially designed to remove oil and residue.
  4. Place the brew basket and filter into the soapy water to clean properly. Then wash using a sponge or cloth to wipe it out completely.
  5. Clean the carafe by discarding any remaining coffee and cleaning it using a sponge. Rinse off with warm water.
  6. Once again, rinse off the brew basket, filter, and carafe with warm water. Dry with a soft cloth and allow it to completely dry.
  7. Wipe down the coffee maker with a paper towel by dipping it in soapy water. Clean the inner lid, outer lid, and brewing area to get rid of any dirt or grime build-up. Then afterward, wipe the soap residue with a clean cloth.

Conclusion

Besides using soap and water, many other natural ingredients and cleaning liquids help maintain your coffee maker. Take your time to clean the machine to give you a better, healthier, and delicious coffee.

Do not just rely on the hot water cycle of the machine and keep it clean to prolong the life span of the maker. Attain the best coffee results by taking your time to scrub and descale the components of any maker separately.

Sunday, 5 December 2021

How to Enhance the Look of Your Walls | Better HouseKeeper

Make your walls stand out with these simple decorating ideas. Keep reading!

When it comes to enhancing your walls, you are more likely to become confused with so many ideas to consider. Knowing which color to use, what theme will look better, and what else you can do to decorate the walls is not easy. Well-decorated walls can change the look and feel of your house. To assist you, read this article to learn how you can enhance the look of your home.

1. Texture Painting

If the idea of simply painting your walls is not appealing, then the best way to enhance your walls is by texture painting. You can hire a professional to paint for you or do it yourself. Alternatively, you can go for lime plaster, a combination of marble, lime putty, and water. It is also known as Venetian plaster, and it goes well with bold colors. They have a detailed guide on how you can use this plaster to enhance the look of your walls.

2. Install Wainscoting

Wainscoting can help you enhance your walls by adding character and dimension to other rooms in your house without taking over the entire wall. You can install this decorative paneling on the lower half of the walls. Wainscoting comes in different designs and styles, meaning you can get one suitable for your house, whether modern or traditional.

3. Use Shelves For Decoration And Storage

Shelves are excellent tools for enhancing your walls. There are many shelf designs that can fit any décor you use. You can use these shelves to display flowers, trophies, family photos, and so on. Additionally, shelves help in utilizing the vertical space of your walls.

4. Stick Decals

Another way to enhance your walls is by sticking wall decals. These are simple ‘apply and peel’ types of stickers that you can easily stick or apply on your walls. All you have to do is buy a designer wall decal and stick it on your blank wall.

5. Use Beads

Another trick for beautifying walls is using beads to decorate them. Create a design or a certain pattern on your wall and glue beads to it. This will give your house an exotic touch.

6. Stick Wallpapers

Most people paint their walls to make the room feel vibrant. However, it won’t hurt to try something new, right? So, rather than buying paint this time, just buy wallpapers. There are varieties of wallpapers in the market, so go and choose a colorful and well-designed one, then stick it on your walls.

7. Add A Backsplash

Consider installing a backsplash if you have blank kitchen walls that you do not know what to do with. This is the best solution because kitchen walls, especially the part behind the sink, attract all kinds of stains. Apart from enhancing your walls, the backsplash makes cleaning splattered cooking oil and water easy.

These are some ways that you can decorate your walls and change the feel of your home. You can either decorate the house on your own or hire an interior design professional to help you.

5 Easy Ways to Add Style to Your Small Bedroom | Better HouseKeeper

Do you have a small bedroom? Here is how you can make it stylish!

Photos By: Unsplash

If you have recently moved into the city, you will have probably noticed that real estate space comes at a hefty premium. For some people, this just means spending thousands more on rent – for most of us, however, this means making the most of the space that we can afford.

If this sounds like you, and it probably does because city life is hellishly expensive, here are five easy ways for you to add tons of style to your small bedroom. It might seem hard at first, but once you realize that it can be quick and easy, you’ll have a new favorite room in no time.

1. Brighten The Space With Natural Light

For smaller rooms, natural light is your best friend. Sunlight is cleansing and rejuvenating, it also adds a cheerful brightness to a space that no artificial light source could ever even hope to provide. Get rid of your old curtains and install gorgeous new blinds, these will allow you to maximize the sunlight during the day, but still, keep you shielded from the bright city lights at night.

2. Be Bold

A small bedroom doesn’t have to be a dreary bedroom. By being clever with your selection of furniture and décor items, you can make bold choices without compromising on style. Show off your bedroom space with confidence by choosing bright and energetic wallpaper and décor choices. Don’t be nervous about using wild and vivid colors in your bedroom; choose whatever color palette you find the most attractive. Choose rich and luxurious colors, these can be changed out whenever the mood strikes. Never feel limited by the space you are in, all it takes is some planning and a bit of faith to leap sad and dull, to sophisticated and stylish.

3. Maximize Your Storage Space

Bedroom storage is a whole new ball game. Built-in wardrobes are a plus but they aren’t always guaranteed. Buy small space bedroom furniture with storage space in mind, from trundle beds to pull-out shelving – there is a myriad of different ways for you to maximize your available storage space.

Buy clothing hangers that allow you to stack multiple items underneath each other, instead of cramming individual clothing items on hangers. There are thousands of storage solutions designed with small spaces in mind; it won’t be hard to find a stylish option that will suit your needs.

4. Create Illusions

Add mirrors to your small bedroom because they instantly add the illusion of space. Bigger mirrors are better, but even the smaller options will be suitable if you don’t want to commit an entire wall.

If your bedroom is particularly small, choose a taller mirror. Tall mirrors draw your eye upward, which will instantly make your bedroom appear bigger.

5. Use The Available Space Well

Small spaces require smart choices. Don’t feel pressured into buying complete furniture sets with chests and pedestals. Use the space you have available, including window sills, to turn your bedroom into the style haven that you deserve.

Common HVAC Myths Debunked | Better HouseKeeper

There are a lot of misapprehensions around how HVAC systems function!

Photos By: Stock Images

Although many people have heating and cooling in their homes, they may not know how they operate. Adding their lack of knowledge to the many myths surrounding HVAC systems, homeowners become more confused.

While it’s easy to believe in myths, especially when they are said to improve efficiency and save energy bills, it would be better to learn about the best maintenance and efficiency choices to ensure your system’s functionality and longevity. This can help you get the most out of your HVAC system. Below are common HVAC myths debunked.

1. Filters can only be replaced once a year

If you decide to wait for a whole year to replace your HVAC’s filters, they can get very dirty. Airborne particles such as debris, grime, and dust can accumulate in your filters every day. Dirty filters limit airflow and cause your system to work harder, increasing utility bills.

To ensure your cooling and heating system’s energy efficiency and keep your indoor air clean, consider changing your filters every few months. Research on the best HVAC filter, to boost indoor air quality and increase the system’s efficiency.

2. Decreasing or increasing thermostat temperature can quickly cool or heat your home

Whether you decrease and increase your thermostat’s set temperature, it takes the same amount of time to cool or heat your home. However, dramatic increases or decreases of thermostat temperature increases energy consumption and, consequently, utility bills.

3. If your HVAC is okay, you don’t need to call a professional

HVAC systems are made up of many parts, including coils, belts, p-traps, and motors which should always be in good shape for high efficiency. Keeping up with regular maintenance helps you identify an issue before it can cause a breakdown or lead to expensive repairs. Additionally, regular HVAC maintenance enables your system to last longer while ensuring energy efficiency.

4. The bigger the HVAC system, the better

You may be tempted to get the largest HVAC system possible, but if your space is too small for it, the system will cycle it on and off too fast and too often, costing you more money and causing the system to wear out more quickly. In addition, a large system can leave your home feeling more damp because the heating and cooling system cannot run long enough to remove moisture from the air. To get the size that best suits your home, consult an HVAC specialist. When buying an AC system, consider your home’s age, the number of people living in your home, climate zone, and square footage.

5. Your thermostat’s placement isn’t important

A thermostat acts as the HVAC’s brain. It tells the system when to turn on and off. This is why your thermostat’s placement is essential if you want to get your home’s overall accurate temperature readings. Placing them in direct sunlight, near vents, adjacent to windows, or near kitchen appliances isn’t a good idea because the temperatures aren’t a representation of the entire home’s temperature.

6. Endnote

With the help of the above debunked myths and continuous learning, your HVAC can last longer, become more energy-efficient, and reduce your utility bills.

Friday, 3 December 2021

Maintaining and Repairing Your Treadmill | Better HouseKeeper

Maintaining your treadmill is an important part of your home exercise routine!

Photos By: Unsplash

A home treadmill is a significant financial commitment, but it can make it much easier to stay on top of your exercise goals. As a result, performing routine maintenance now will save you money in the long term. In this article, you learn about how to maintain your home treadmill working smoothly for many years to come.

How to Care for Your Treadmill

It is essential to keep your treadmill in good working order in order to get the most out of it. With each workout, pay attention to your treadmill. You may ensure that your fitness program is uninterrupted by executing the following things on a regular basis. If something is rubbing or scraping on the machine, stop using it until you find the source of the problem.

Lubricate

The owner’s manual for your treadmill should provide detailed instructions from the manufacturer on how to perform this task. Applying a treadmill lubricant to the treadmill belt’s bottom is the most common method of ensuring a smooth running experience. You should avoid applying it to the belt’s walking surface. Once the treadmill lubricant has been applied, you may also need to loosen the belt and then retighten it. Your treadmill may require more frequent lubrication depending on the frequency, duration, and type of oil utilized. Lubricating it on a quarterly basis is recommended by certain specialists. Thompson recommends against lubricating your treadmill with WD-40 since it can quickly damage the belt.

Vacuum

You should vacuum the area around and under the machine at least once a week, if possible. If you frequently use your treadmill, dust and other debris will build-up towards the machine’s rear. Most of it comes from the bottoms of your shoes, not the walking belt. At least once a year, you should vacuum the inside of the machine as well. Turn off and unplug the machine before removing the motor cover to vacuum its interior. Avoid touching any of the electrical components with your vacuum nozzle, and be especially careful around them.

Cleanse

Every time you use your machine, you should wipe it down. This step is particularly more critical if you are frequently perspiring. The machine’s metal parts will begin to corrode, and bacteria and fungi will flourish as a result of the buildup of moisture. While a moist cloth usually does the trick, a home treadmill cleaning kit can be worth the investment.

Check for Wear

Check for signs of wear on the walking belt and deck about once a week. In order to get the most out of your treadmill, keep the belt centred. Also, make sure the belt is straight and in the middle. No matter how nicely it is positioned, it should not scrape or rub against the sides. A misaligned belt is the most likely culprit if you find your treadmill going slowly or sluggishly, or if you feel like you’re slipping. It’s easy for a crooked belt to get frayed and torn, which means it’ll wear out much more quickly than it should. To extend the life of the treadmill as a whole, replace the belt when it becomes worn and abrasive.

Set up a Mat

It’s more important to safeguard the area around your treadmill than the treadmill itself when using a mat. If you have a treadmill in a second-story room, a treadmill mat will protect your flooring and keep noise to a minimum. In addition to keeping pet hair and dust from gathering on your vacuum cleaner, having an anti-slip mat in place can also assist make it easier for you to vacuum the floor around it.

Protect Electrical Components

Electrical concerns should be monitored on a regular basis. While operating your treadmill, if you notice any kind of burning smell, you should immediately stop and unplug it from the wall before analysing what is causing it. A burning scent should never be ignored because it can soon turn into a fire threat.

Protect the electronic components of your treadmill by connecting it to a surge protector. This will keep your treadmill secure from power surges and outages. Observe the machine’s power cords for signs of damage or wear and tear, and replace them if necessary.

How Often Should Treadmill Belt Be Lubricated? | Better HouseKeeper

Did you know that treadmills need to be frequently lubricated? Here’s how!

Photos By: Unsplash

No need to seek any further if you’re looking for a solution to the query “How often should treadmill belt lubrication?” Everything you need to know about treadmill lubrication is here, including how often to lubricate and how to lubricate. Keeping in mind how important it is to keep your treadmill well-lubricated initially.

Why Lubricate a Treadmill?

Silicon oil is necessary for treadmills to perform correctly, just like automobile oil. The same principle applies to the treadmill lubrication. It protects the treadmill’s moving parts from damage and prolongs the life of your machine. The treadmill will last much longer if you keep it lubricated regularly than if you don’t.

Even though it’s a hassle, maintaining your machine with best treadmill lubricant is essential if you want to get the most out of it. Ultimately, it will save you time and money. As a bonus, it will provide you a sense of security that your treadmill is in good working order and will help you meet your fitness objectives. To avoid forgetting to add lubrication, it’s important to write it down in your calendar, and I’m guilty of doing this myself. Exactly at what time should it take place? The time has come.

How Often Is the Treadmill Belt Lubricated?

There are several ways to tell if your treadmill needs lubrication. There are a number of ways to tell if you need to lubricate your treadmill, the most obvious of which is if you smell or see smoke when you switch on the machine. When it comes to seeing or smelling it, you’d better be careful. Lubricating your treadmill is the best way to avoid this. It’s best to avoid that at all times. Follow these two suggestions to make it happen. The treadmill belt should be greased at what frequency?

40 hours, or three months

Most well-known treadmill manufacturers advocate this as a general rule. That’s a good question. To put it another way, if you use your treadmill more frequently, you’ll need to oil it more frequently.

The exception to this rule is if you use your treadmill fewer than 40 hours in a three-month period, in which case you should lubricate it with best treadmill lubricant every three months. Make a note of it in your calendar or phone, whatever it takes to keep it fresh in your mind.

Treadmill Lubrication

The fact that each treadmill is unique should come as no surprise. Varied types and models require different lubrication contents as well as the correct amount of lubricant to function properly.. It’s important to read through your treadmill’s owner’s handbook to ensure that you are using the correct lubrication for your treadmill’s belt. Aside from the owners handbook, you can readily locate the manufacturer’s literature online. Running on your treadmill is actually very simple to maintain. In order to lubricate the belt, all you actually need to do is lift it and apply oil beneath, making sure that you don’t get any on top of it.

While you’re lubricating your treadmill with best treadmill lubricant, it’s also a good idea to check for other maintenance issues, which should be detailed in your treadmill’s owner’s manual. It’s not uncommon for treadmill maintenance to include inspecting the belt for tension and alignment, the motor for any damage, and the treadmill’s frame for any faults or damage.

What lubricant for treadmill?

It is possible to use wax or silicone treadmill lubrication. Manufacturers recommend using a silicone lubricant for most treadmills now on the market. It’s much easier to apply silicone because it comes in a liquid form that can be readily spread on your treadmill.

When do you need to lubricate?

When using the band, the user’s weight, the number of people using it, the amount of time they spend training, and the temperature of the training area can have a significant impact. The monitors on many treadmills alert you when it’s time to lubricate. 

Conclusion

The treadmill’s maintenance should be taken extremely carefully. As long as you enjoy saving money and maximising your most precious asset, your time! So don’t just throw away your owner’s handbook and put it in a drawer somewhere. For whatever reason, it was supplied to you in this form. It’s not enough to simply lubricate your treadmill; you also need to make sure it’s working properly.